CREATION DE FORMES PAR INSERTIONS DE LIGNES DE CONSTRUCTIONS
Pour effectuer ce top avec incrustations de lignes de construction il faut:
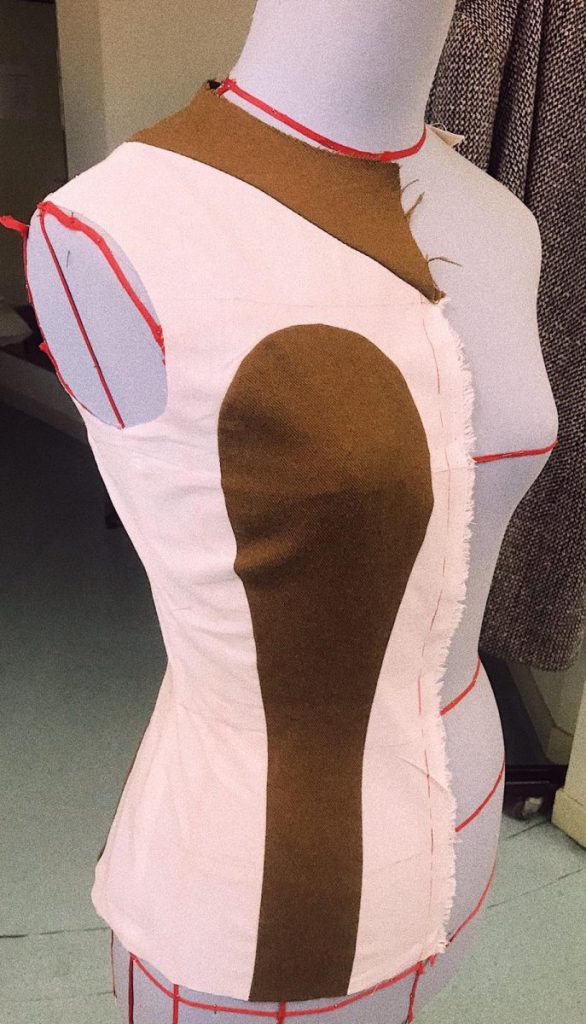
Etape 1:
- Transposer le gabarit de base sur toile. La demi toute est assemblée et piquée.
- porter sur cette toile toutes les lignes d’aplomb et de construction.
- positionner cette toile sur le mannequin.
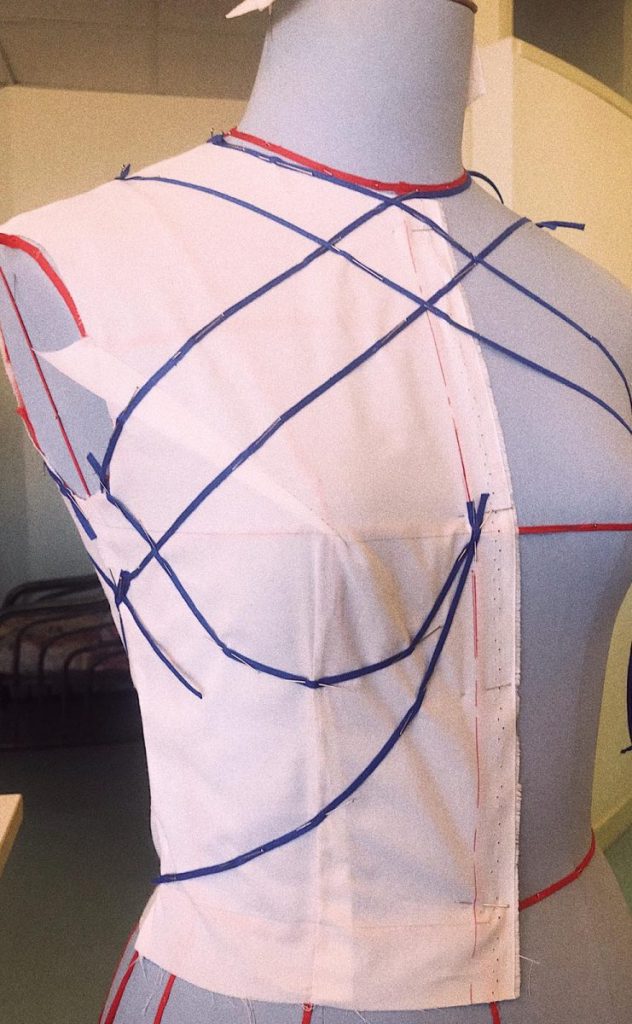
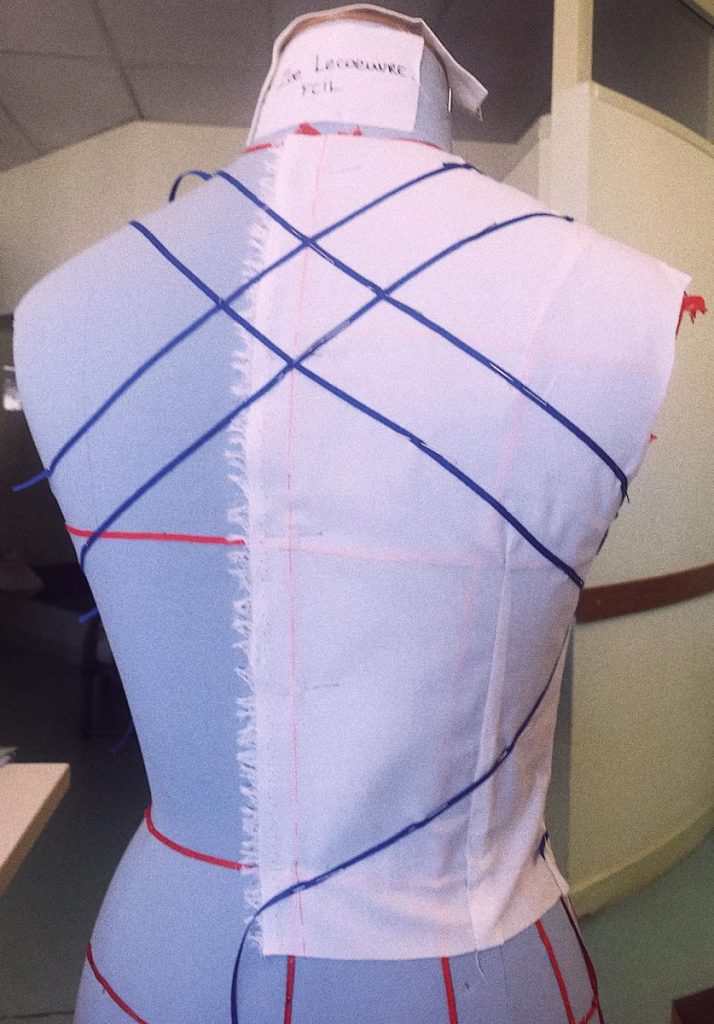
Etape 2:
- Avec un bolduc, racer des lignes de découpes, sans se soucier des pinces.
Etape 3:
- Vérifier les repères de taille, de poitrine et hanche, tracer le long des bolducs et couper les formes obtenues.
Etape 4:
- Positionner vos formes à plat, vous constatez que vous avez un patron en 3D
- cranter et ouvrir vos découpes pour obtenir un patron à plat.
Etape 5:
- Relever le patron sur papier et le couper sur toile.
- Ajouter les valeurs de coutures pour obtenir un patronage.
- Soutenir les parties en « formes » qui ont été coupées.
- Assembler.
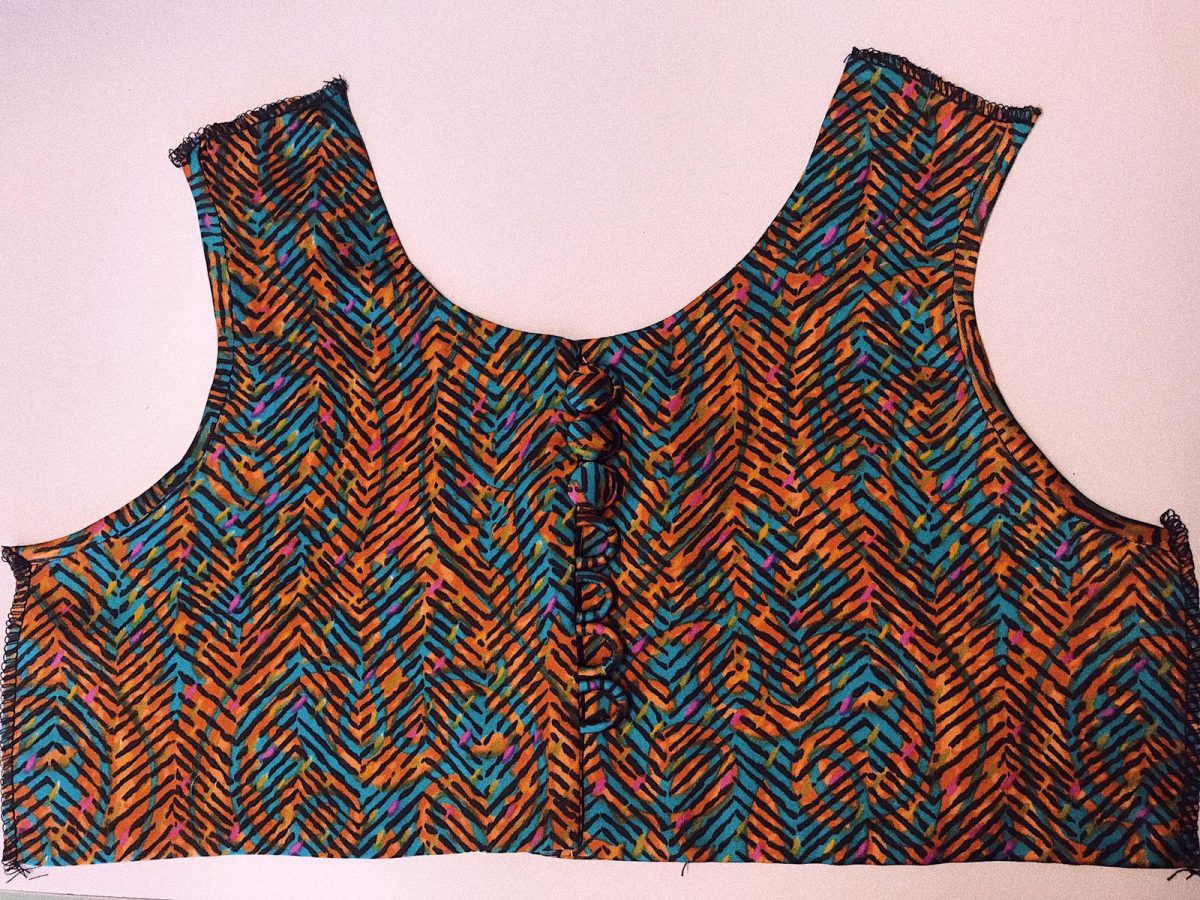
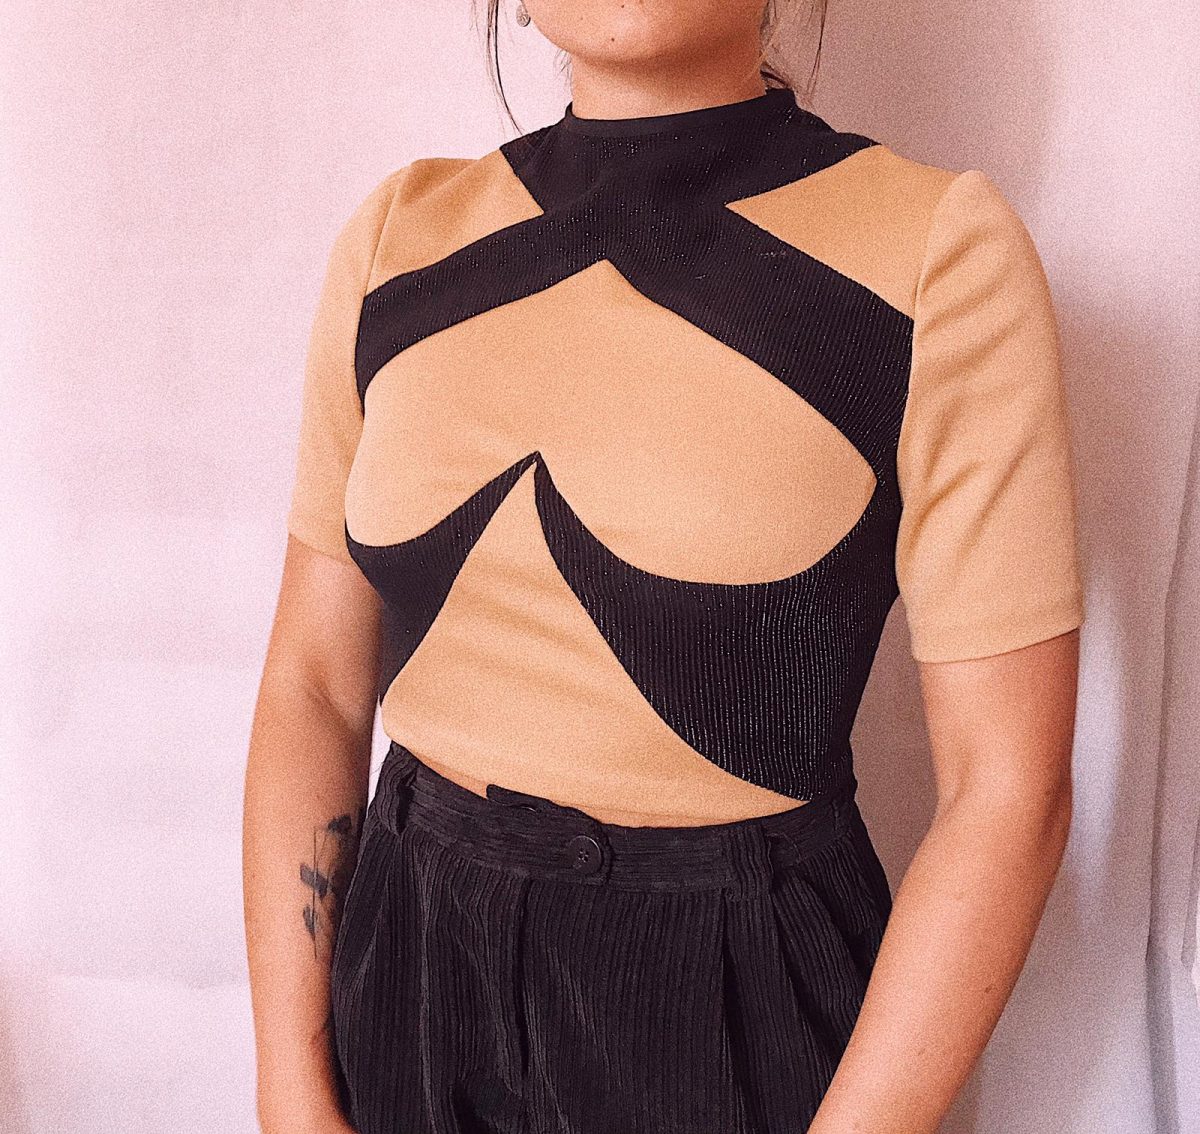
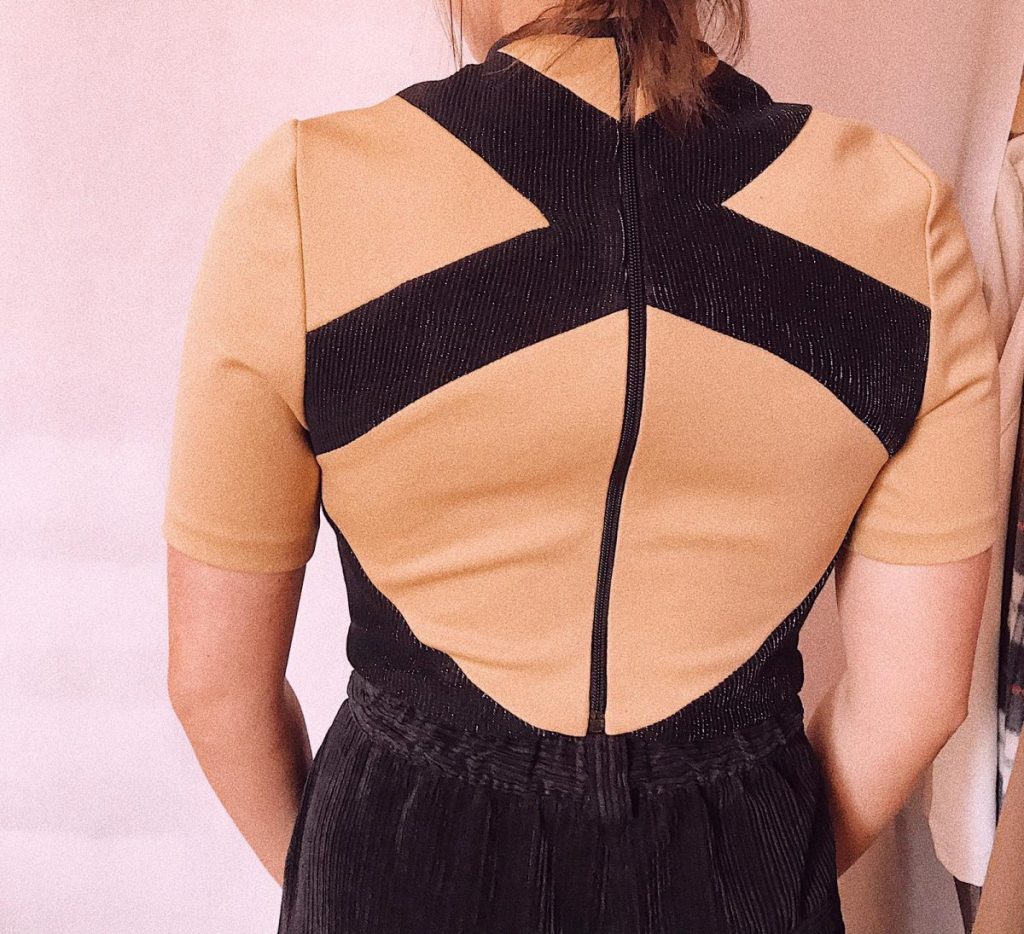
Première étape, initiation:

Deuxième étape, confection de notre propre modèle:
Finalisation de mon modèle :

CREATION OF SHAPES BY INSERTING CONSTRUCTION LINES
To make this top with building line inlays you need:
Step 1:
- Transpose the basic template onto canvas. The half whole is assembled and stitched.
- Carry all the plumb and construction lines on this canvas.
Position this canvas on the dummy.
Step 2:
- With a bolduc, rasp cutting lines, without worrying about the pliers.
Step 3:
- Check the waist, chest and hip markings, trace along the bolducs and cut the resulting shapes.
Step 4:
- Position your shapes flat, you see that you have a 3D pattern.
- notch and open your cuts to get a flat pattern.
Step 5:
- Take up the pattern on paper and cut it on canvas.
- Add the stitching values to obtain a pattern.
- Support the « shaped » parts that have been cut.
- Assemble.